Welcome to my blog!

I used to blog here mostly using local photos about my neighborhood or Washington DC or other places I visited. But over time I found myself blogging about crafts or sewing projects or my activities as a seller of collectibles on Ebay (look my stuff up under Mugsim7) or other topics, such as selling my beautiful old Victorian townhouse. Occasionally, I take a break from blogging so you won't see anything regularly. But I'm still have fun writing it. May your days be blessed with miracles, and creativity too!
Showing posts with label ribbon. Show all posts

Thursday, February 9, 2017

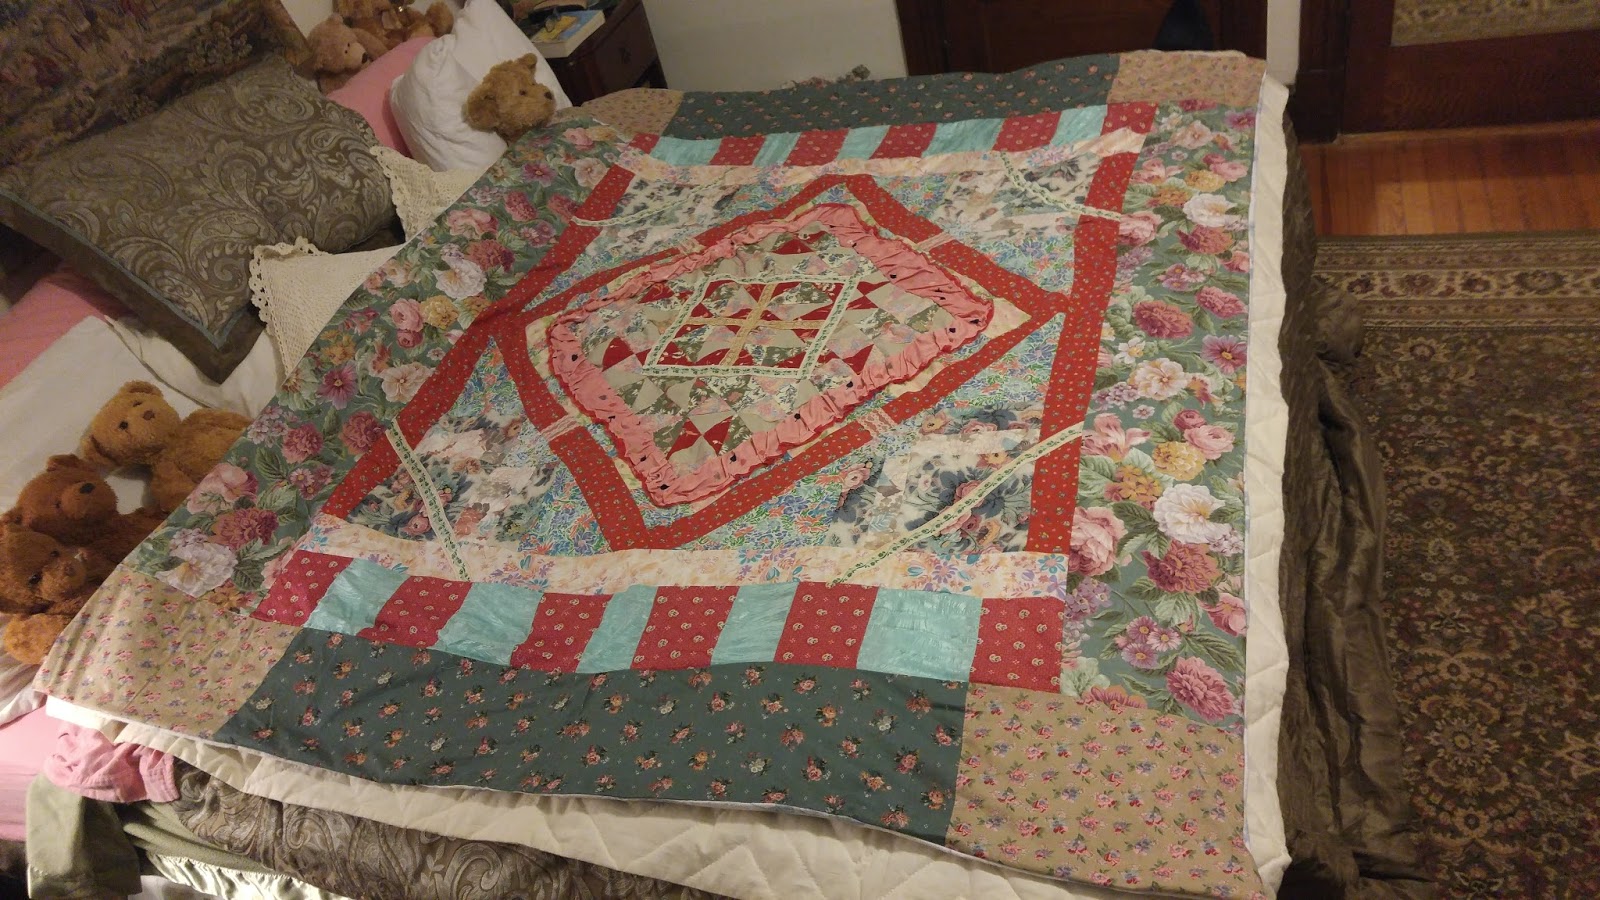
Crazy Quilt Finally Finished After Ten Years

Close up of central ornamental part
Full view on the bed.
I finally finished a quilt that I started over ten years ago. It is made of scraps of fabric and ribbon and bits of found lace that I stitched together at odd times over the years. It was sitting in my stash of "unfinished sewing projects" for way too long. About a year ago (!) I got the final pieces seamed together along the edges and this week I stitched on a backing. This was an old flannel sheet with a pretty floral design on it that I got for $3 at the Salvation Army Family Store and that makes a nice warm cozy back to the quilt top as I decided to forgo inserting batting between the two layers of fabric.  I was inspired to finish this by watching a PBS TV show recently -- Sewing with Nancy -- on making quilts where Nancy (Zieman) showed how to make perfect squares and triangles and how to arrange them for classic quilt designs.  Well, my quilt is not like that but more along the lines of a 'crazy quilt' in terms of design, as crazy quilts are basically easier to make as you kind of make them up as you go along which is how this quilt got made!  I recycled an old loose weave cotton knit blanket on the inside as the "batting" and added a full size flannel sheet for the underside.  It's large enough that the quilt can lie on top of a king size bed or can hang over the edges on a smaller bed.  It's mostly pinks, reds, greens and a lot of floral bits with some lace and ribbons and a stitched down ruffled part in the center, so the overall effect is on the "feminine" side. I've done some stitching in the ditches, but not completely throughout the quilt.  I'm thinking I might sell this quilt if someone makes me an offer and I can bear to part with it!


Thursday, July 7, 2016

Pillowcases become Little Girl Dresses

Well, these are the last two little girl dresses I made out of pillowcases and by now I had got the drill down fast. First I dyed the pillowcases and after drying cut the fabric. Cutting is simple as I'm just snipping off the top about 6 inches so I can make the ribbon that goes through the neckline casing. Then I cut out the armholes and use those pieces to make the top stitched pockets on the front of each dress. Since these were one seam pillowcases, I put that seam down the back and angle seamed the sides so the dress would flare a bit at the bottom. Then I stitched on embellishments -- in this case some silver ribbon made from a hem I'd hacked off another dress. The yellow lace was left over from a table cloth I'd cut up another time (as it was all torn up except for the lace bits). Then I do the neck casing, about an inch and a half and then, after making the ribbon for the casing, I thread it through and make a bow for the shoulder.
I think I've now got the drill down to about 45 minutes per dress (not including the time to dye and wash and dry). There's tons of tutorials on Pinterest and in various blogs if you need a pattern for making these, just search away!
While I'm sewing these, I stay praying for the girls that will hopefully receive these. I think about how the dress will go with their personality and fit them properly (so I put a size label on them--you can see the white tag hanging off the pocket).
So these were given to Church of the Redeemer in Bowie, MD This church has a ministry where they deliver these to a non-profit that then packs off the dresses and other items to orphanages in various parts of the world.   So once again, I was happy to re-use and recycle some pillow slips and put them to a good use.  

Saturday, January 23, 2016

Old Light Bulbs Become Christmas Decorations

I'd accumulated some old light bulbs that I didn't want to put in the trash and hadn't found my way over to the recycling center, so I decided to turn them into Christmas ornaments. A quick couple of sprays with the silver spray paint and then I glued on some ribbon as a way to hang them and eh voila, nine light bulbs have a new use. Now I didn't finish them before Christmas so they didn't make it to our Christmas tree this year, but I'll be storing them away for next year with the other glass baubles and will hang them then.  Over the year I may think about adding other decorative elements to these, such as gluing on some shapes in bright colors or putting red or green strips of ribbon on them or some white snowflakey things...... well I've got 11 months to think about this.  Just glad to explore re-use of used light bulbs!

Monday, September 21, 2015

Pillow from scrap fabric


When no longer needed, I think baby blankets make useful fabric pieces to make into other things and this fuzzy blue giraffe blanket just begged to be made into a soft pillow.  First, I embellished one side with some left over brown satin ribbon from the stash pile of fabric and findings that accumulates each time I do a clear-out of a closet or drawer.  I used brown ribbon as this blue pillow was to be paired with another pillow, also brown.  Putting right sides together, I then stitched three and a half sides, leaving half a side open for later insertion of the pillow stuffing.  After turning to right side out, I squeezed in the pillow stuffing (acquired on sale at in Walmart), then hand-stitched the opening and lo and behold, had another cute pillow for my son's bed. This project took hardly any time at all as I did the laundry at the same time, making for a very productive Monday morning.

Sunday, September 13, 2015

Little Girl's Pillowcase Dress

I'd read about making a little girl's dress from an old pillowcase on Pinterest and other websites so I decided I just had to try one and it came out all right, don't you think? I found a pillowcase in the closet that didn't seem to have a mate -- another one of those things that disappear in the laundry. Once I figured out the heavy end seam was the bottom of the dress, I then cut along the top and cut out the arm holes.  I quickly trimmed the armholes and then turned over the top with a large seam that could hold a ribbon.  Since I'm working on busting through my bag of scrap fabrics, I found this rather pretty pink satin fabric that was once the lining to a jacket, and stitched into a long tube that became the ribbon. I then threaded this ribbon through the top seam and eh voila, pillow case dress! I added on a little pocket using the leftover fabric from the arm hole cut out and stitched it as a patch pocket right onto the dress, using some pink zigzagging as decoration.
Overall, I was quite happy with how it came out and was very pleased when a little 7 year old girl came by and when I showed it to her she said she wanted it!  I adjusted the tie ribbon for her height and she said she was going to use it as a night dress!  I am so pleased to have done this project but just a little miffed with myself for not taking of photo of the little girl in the dress, er, nightgown!


Friday, September 4, 2015

Clock Made From Chip Tube and Oddments


Inspired by all the artsy crafts projects I see on Pinterest, I made a clock for the basement living room out of a cardboard chip tube, some spare spray paint, some ribbons and a clock face I'd bought to fix another clock but it was the wrong size.  So for this one, after spray painting the inside and outside of the chip tube, I cut out the circular shape for the clock face using an exacto knife after drawing a circle around the clock onto the cardboard tube.  Then I wedged in the clock face and put some weights in the bottom of the tube so it wouldn't tip over easily.  I used those glass beads you put in flower vases but any weight things would do. Then I put the lid back on and then decorated the tube by gluing on some salvaged gold and blue ribbon pieces. I quite liked the overall effect and it's good to have a clock in this room and when the battery fails, I can just open it up and pop in a new one.

Wednesday, September 2, 2015

Ever Changing Wreath on Front Door

I'm really into re-use, reduce and recycle so for my front door wreath I used an old twisted twig wreath form that I got years ago in a Michaels Arts and Crafts store and that I update seasonally.  This summer I used red and yellow fake flowers that I found thrown out in someone's trash in the alley (thank you very much!). First I cleaned them up a bit, cut off the extra plastic twiggy bits and then stuck them into the wreath.  The plaid green and blue ribbon I also found in the trash, someone had tossed the unfinished roll out, and you can be sure I spied it and commandeered it for re-use. The ivy leafy vine wrapped around the wreath I got years ago also, probably at The Dollar Store,  great source of cheap arty crafty bits and bobs. I'm quite glad how this colorful wreath brightens up my front door for these late summer days.  Soon, of course, I'll be changing out the flowers for the autumn, that is, once I gather some orangey yellow bits and pieces together.....

Saturday, July 24, 2010

Light at Cannon

We paused in the corridor of the Cannon House Office Building the other day after a visit to Majority Leader Steny Hoyer's office, and I happened to glance up and see this amazingly ornate lamp hanging from an amazingly ornate decorated ceiling. Since the two people I was with were blind, when I told them what I saw, they asked me to describe it and agreed with me how unique and unusual this was. In fact, the whole corridor ceiling was covered in decorative plaster work painted in white, french blue and embellished with ribbons of gold foil in some places.  The lamp itself was frosted glass held in a basket of lacy brass that included arrowhead designs and some other shapes that I could barely discern from the floor below. The floor below was nothing to sneeze at neither, of shiny black and white marble squares, gleaming gently due to the muted lamp light. On reflection I wondered who designed this lamp and ceiling and by what inspiration? And, who keeps this in good repair, who gets to change the light bulbs on such wondrous work that we own, how many notice this incredible wealth of the nation?