 |
| Lace border on the "sock" sleeve extender |
 |
| Used quite a long sock for the sleeve extender |
|
| Lace border on the "sock" sleeve extender |
|
| Used quite a long sock for the sleeve extender |
 |
| Close up of central ornamental part |
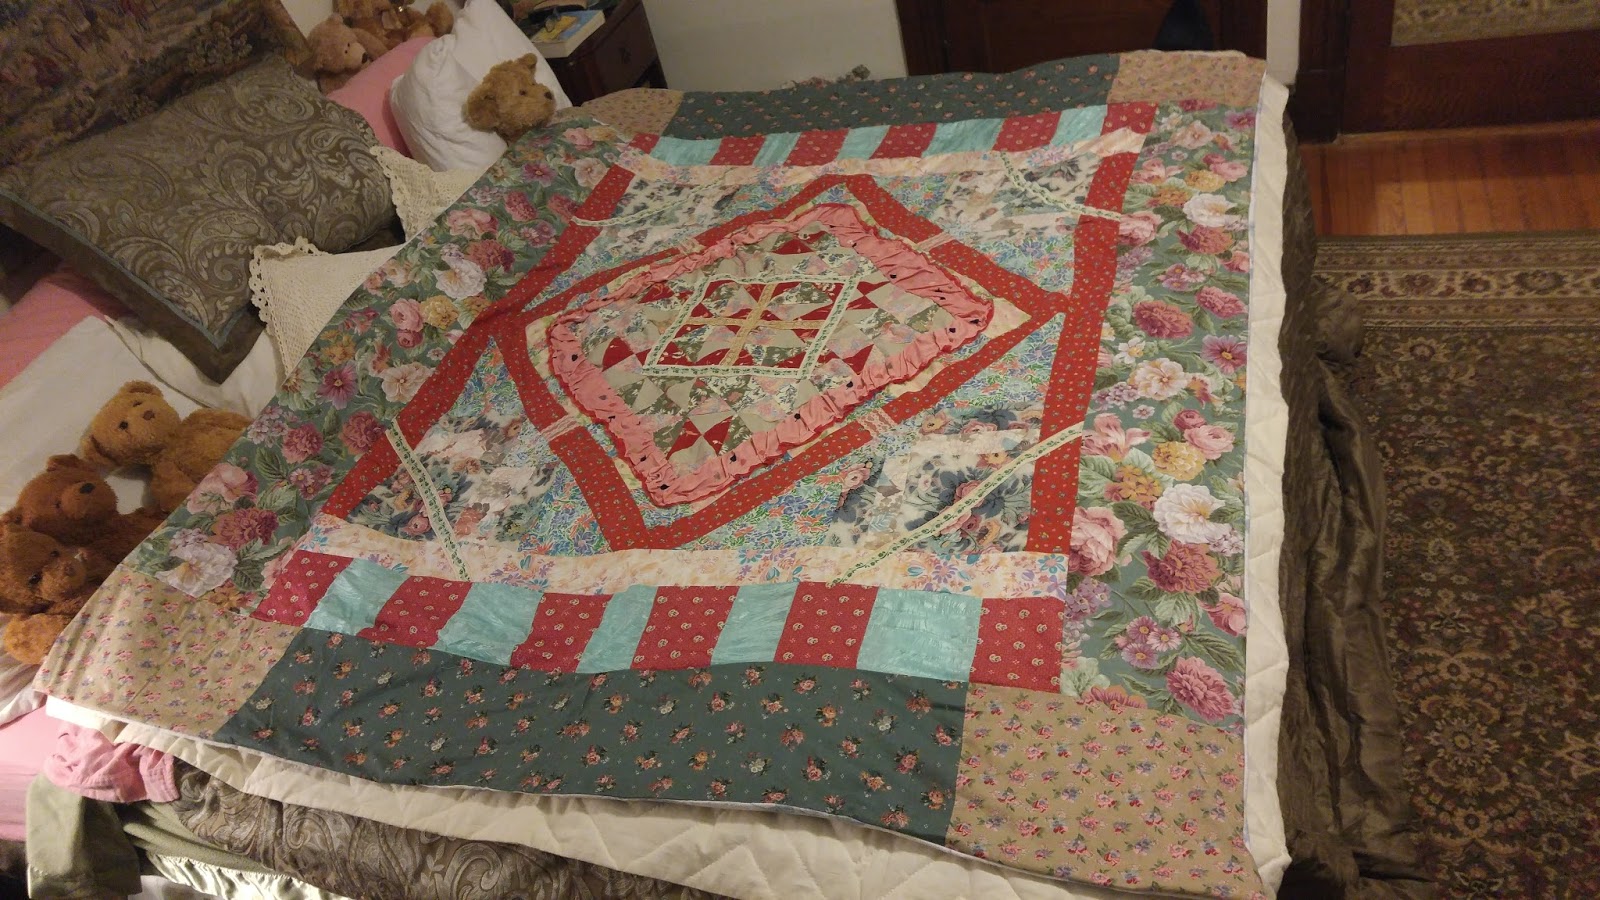 |
| Full view on the bed. |
 I finally finished a quilt that I started over ten years ago. It is made of scraps of fabric and ribbon and bits of found lace that I stitched together at odd times over the years. It was sitting in my stash of "unfinished sewing projects" for way too long. About a year ago (!) I got the final pieces seamed together along the edges and this week I stitched on a backing. This was an old flannel sheet with a pretty floral design on it that I got for $3 at the Salvation Army Family Store and that makes a nice warm cozy back to the quilt top as I decided to forgo inserting batting between the two layers of fabric. I was inspired to finish this by watching a PBS TV show recently -- Sewing with Nancy -- on making quilts where Nancy (Zieman) showed how to make perfect squares and triangles and how to arrange them for classic quilt designs. Well, my quilt is not like that but more along the lines of a 'crazy quilt' in terms of design, as crazy quilts are basically easier to make as you kind of make them up as you go along which is how this quilt got made! I recycled an old loose weave cotton knit blanket on the inside as the "batting" and added a full size flannel sheet for the underside. It's large enough that the quilt can lie on top of a king size bed or can hang over the edges on a smaller bed. It's mostly pinks, reds, greens and a lot of floral bits with some lace and ribbons and a stitched down ruffled part in the center, so the overall effect is on the "feminine" side. I've done some stitching in the ditches, but not completely throughout the quilt. I'm thinking I might sell this quilt if someone makes me an offer and I can bear to part with it!
 |
| After stitch witchery |

 Determined to use up some bits of old white and black lace and a shiny ornament, I went into my closet to see if there was some blouse or shirt that could use some embellishment to get me to wear it again. I found a somewhat worn white and grey printed blouse that I hadn't worn for two years and thought this was a good candidate for some scraps. It turned out I had just enough bits and pieces to make a fairly pleasing square shape out of the strips of lace. I stitched them on with the machine but hand-stitched the metallic diamond shape as I might have damaged it with the presser foot. I think it came out all right and I've worn this a few times this summer and got some use out of something I might otherwise have cut up into rags or something.
 |
| What blouse looked like before |


 Actually I made this couch blanket over ten years ago but am posting about it now as it helps me realize I've been into re-use and recycling for a long time. The story about this creation is that, by mistake, or should I say inadvertently, I brought home one of those airplane blankets -- I think this might have been from Delta airlines. It sat around a while and then I knew I just had to do something with the blue and pink lace yardage that I'd taken off some old 1960s prom dresses (yup, I'd kept those a long time and salvaged the lace and satin bits). So I cut these lace pieces into the shapes of various letters from the runic alphabet as they are interesting shapes with interesting meanings and something I once studied. I stitched them on directly onto the outer blanket surface, turning the edges of the rune letters as I went along. Not being perfection oriented, I just scattered the rune letter shapes in a rough design around the edge of the blanket. Then going back to the fabric scrap pile, I found an old worn sheet and taking the best bits of that and stitching them together, I created the lining or backing for this couch blanket, just overstitching it on and using some more leftover strips of the lace as a binding around the edge. Over time, this has gotten washed and so the navy blue has gotten a bit purple in places and the pink and blue laces pieces have faded out somewhat, but I've always received quite a few compliments from visitors when they see it tossed on the back of a living room chair. And, of course, it's a comfy thing to have in the winter when there are a few draughts about.

